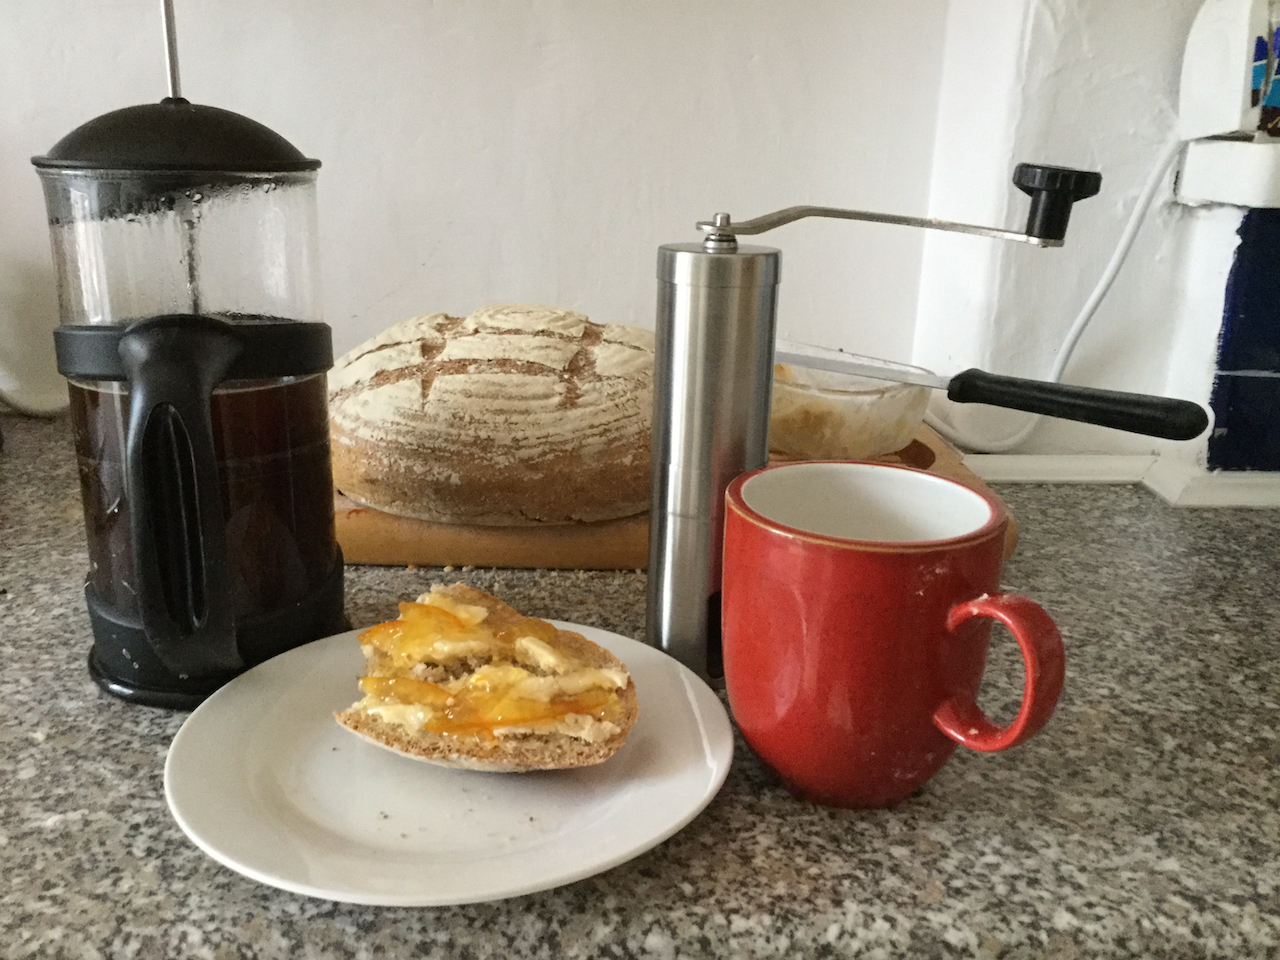
Homemade bread… Hand-ground coffee…

Passing clouds of inconsequential observations
Homemade bread… Hand-ground coffee…
Who does not love the smell of baking bread? I know I do and every other day I am mixing up the sourdough ready to go. The mixture is flour and water with a sprinkle of salt and a splash of oil. In the place of yeast you use what is known as a starter which is itself flour and water that has been left to develop into a microscopic battleground between bacterias and natural yeasts. This can sometimes seem like a chemistry lesson…
A starter prepared from scratch with a salted wheat-rye dough takes about 54 hours at 27 °C (81 °F) to stabilise at a pH between 4.4 and 4.6. 4% salt inhibits L. sanfranciscensis, while C. milleri can withstand 8%.
…or a history lesson as people make bizarre claims for the longevity of their starter. But if you just remind yourself that millions of people have been doing this for thousands of years without knowing any of that stuff you will be fine and it is really easy…
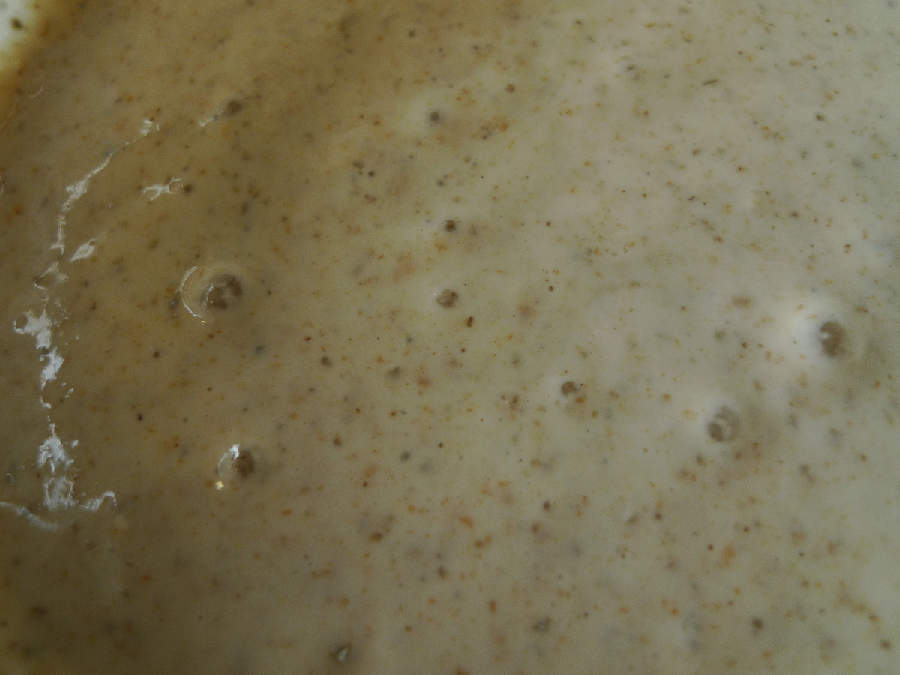
To start the starter mix some flour and warm water in a one pint bowl to a fairly thick batter and leave it out for a couple of days until it starts to bubble and looks lively. You need to feed your starter with fresh flour and warm water. If you are not using it regularly throw half of it away and top it up with a feed once a week. It can live in the covered bowl kept in the fridge to slow its growth rate.
To make some bread get the starter out of the fridge and let it warm up for an hour or two. Then give it a feed with some fresh flour and warm water. Once it starts to bubble up it is ready to go.
Chuck around one pound (454 g) of strong bread flour in to a big bowl and add a good dollop (2 handfuls – yes it is a messy business) of your starter. If you want to do it properly you weigh out your flour and add everything else as a percentage of that weight. I rub the starter in to the flour as you would rub the fat when making pastry.
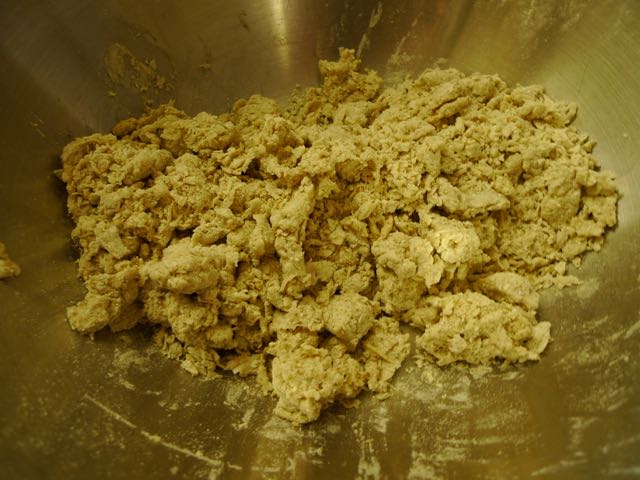
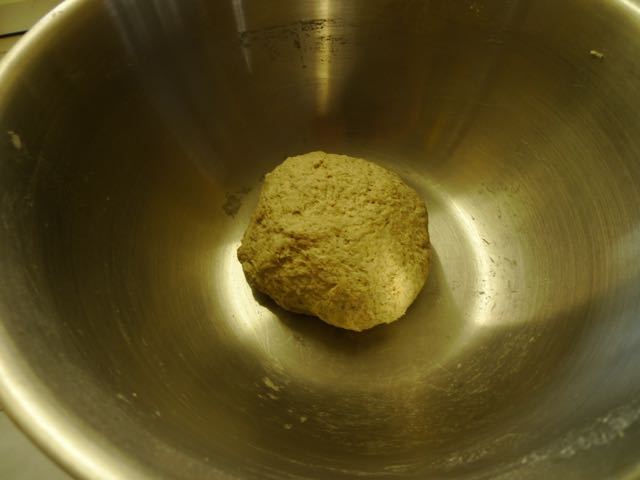
To this add a sprinkle of salt and a splash of oil if required. Then add some warm water to stick it all together to form a soft dough – better to be too wet than too dry as you can add more flour. Kneed your dough for a few minutes to make a nice smooth ball and then leave it for several hours – overnight works for me.
When you return to it there should be some noticeable growth.

Kneed it for around 7 minutes (this depends on the temperature/humidity of your kitchen etc.) and the dough should become quite stretchy. You can stretch it in to a long strip and fold it back over itself a couple of times to relieve the kneading strain. You are building up the microscopic structure of the bread and so the more criss-crossing strands you have the better. With a good structure you should be able to stretch the dough out thin enough to see light coming through it without any holes forming.
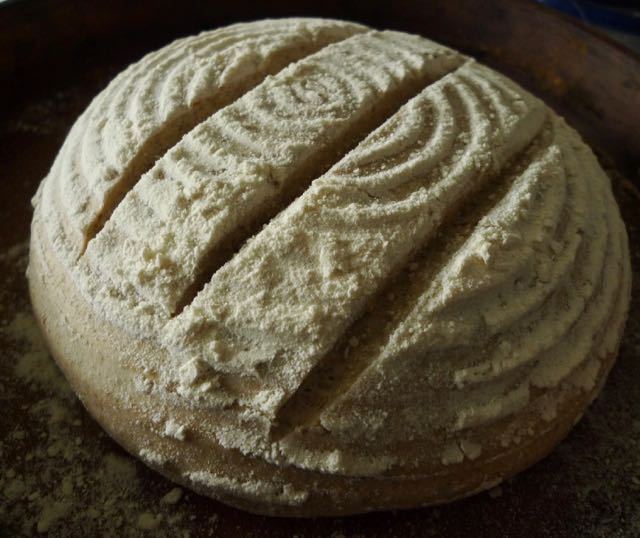
You can now shape your loaf and leave it for an hour to puff up a bit. You can put it in a loaf tin, a banneton or, with a fairly firm dough, form it in to the desired shape free hand. Slash it with a sharp blade to let the steam out while it bakes.
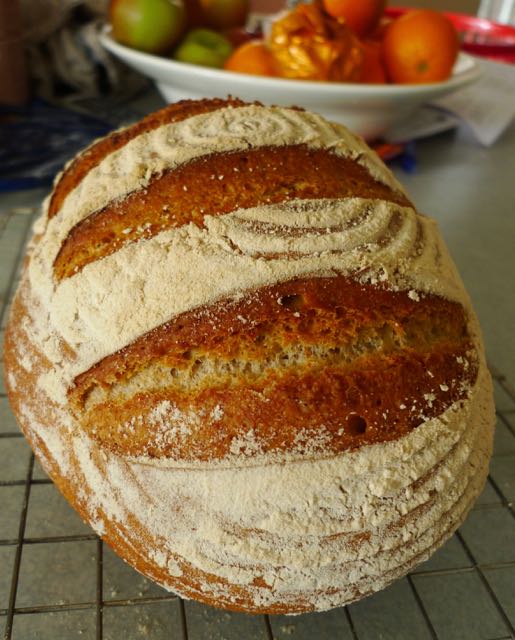
Put the oven on high (hotter than hot setting) and when it is really hot pop the bread in and bake for 45 – 55 minutes – reducing the heat half way through. You will then have a loaf full of yummy goodness.
Experiment. There are countless recipes and pages of advice but non of them are working in your kitchen with that flour you are using. See what works for you. You will get to know the feel of good dough. Even a bad loaf gets eaten.